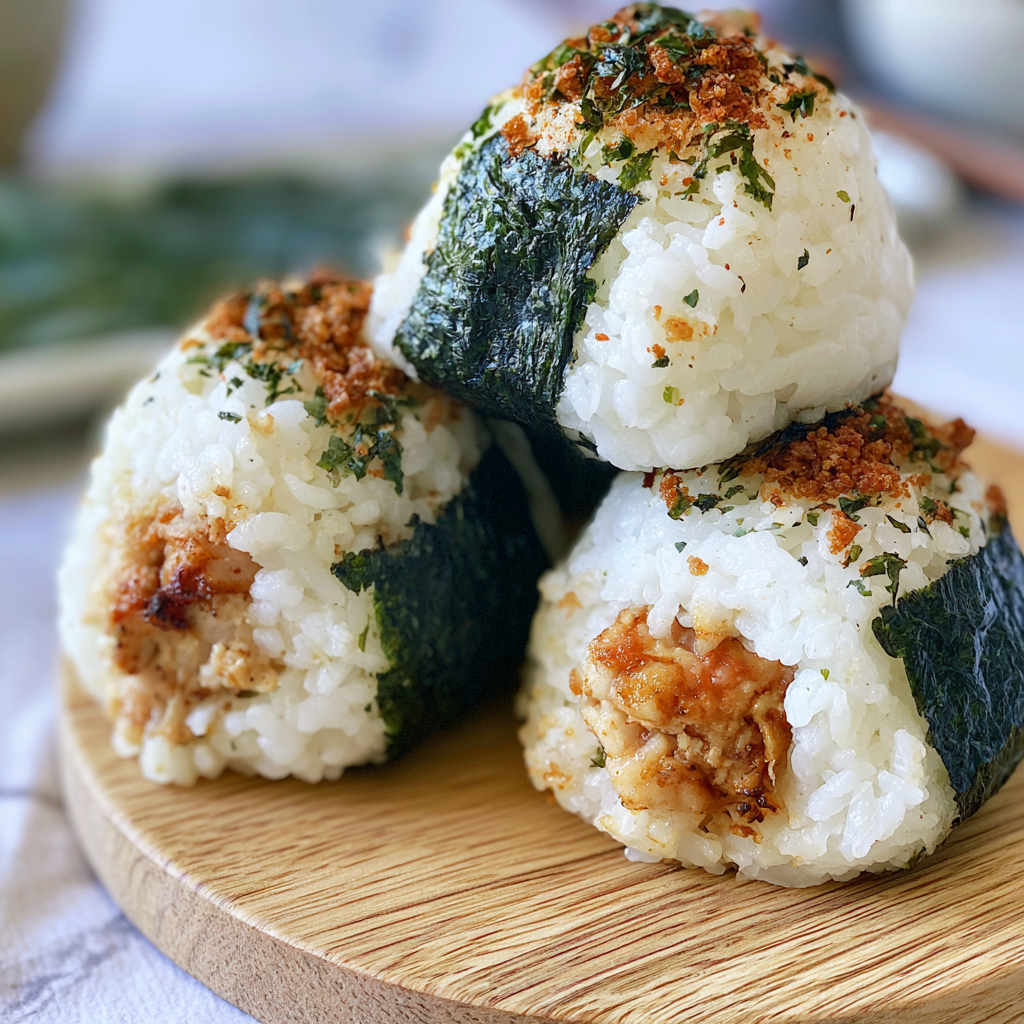
Chicken Onigiri is a delicious Japanese-inspired snack or light meal made with seasoned rice wrapped around a savory chicken filling. These handheld rice balls are easy to prepare, portable, and perfect for lunch boxes, meal prep, picnics, or a quick bite any time of day. Wrapped in crisp nori and filled with juicy, flavorful chicken, they’re both comforting and satisfying.
Whenever we have a busy weekend or head out for a picnic, I always make a batch of these chicken onigiri. My husband loves grabbing one for a quick lunch, and the kids think they’re fun to eat because they’re perfectly sized to hold in their hands. I often prepare them the night before, and by the next morning, everyone is already asking if there are enough to pack in their lunch. They’re simple, filling, and have become one of our family’s favorite grab-and-go meals.
Why This Chicken Onigiri Recipe
This homemade Chicken Onigiri is packed with tender, well-seasoned chicken tucked inside fluffy Japanese rice for a delicious balance of textures and flavors. The filling is savory with a hint of sweetness and umami, while the rice stays soft and slightly sticky, making it easy to shape.
Not only are these rice balls budget-friendly, but they’re also easy to customize with your favorite seasonings or vegetables. Whether you’re making lunch for the family or preparing meals ahead of time, this recipe is a convenient and satisfying option that everyone will enjoy.
Ingredients (Makes 8 Onigiri | Serves 4)
For the Rice
- 3 cups cooked Japanese short-grain rice (about 540 g / 1.19 lb)
- 1 teaspoon salt (6 g / 0.01 lb)
- 1 tablespoon rice vinegar (15 ml), optional
For the Chicken Filling
- 12 oz boneless, skinless chicken thighs or breasts, cooked and finely shredded (340 g / 0.75 lb)
- 2 tablespoons soy sauce (30 ml)
- 1 tablespoon mirin (15 ml)
- 1 teaspoon sesame oil (5 ml)
- 1 teaspoon sugar (4 g / 0.009 lb)
- 1 teaspoon grated fresh ginger (5 g / 0.01 lb)
- 1 garlic clove, minced (5 g / 0.01 lb)
- 2 green onions, finely sliced (30 g / 0.07 lb)
For Assembly
- 4 sheets nori, cut in half
- Water for moistening your hands
- Salt for lightly seasoning your hands
Directions
- In a small skillet over medium heat, combine the shredded chicken with the soy sauce, mirin, sesame oil, sugar, ginger, and garlic. Cook for 3 to 4 minutes, stirring occasionally, until the chicken absorbs the seasonings. Remove from the heat and stir in the sliced green onions. Allow the filling to cool slightly.
- If desired, season the warm cooked rice with the salt and rice vinegar, gently folding to combine without mashing the grains.
- Wet your hands with water and lightly rub them with a little salt to prevent the rice from sticking.
- Scoop about ½ cup of rice into your palm and gently flatten it into a small disc.
- Place 1 to 2 tablespoons of the chicken filling in the center.
- Cover the filling with another small amount of rice and gently press everything together, shaping it into a triangle or round ball while sealing the filling inside.
- Repeat with the remaining rice and filling.
- Wrap the bottom or one side of each onigiri with a strip of nori just before serving to keep the seaweed crisp.
- Serve immediately or refrigerate for later.
Notes
- Japanese short-grain rice is essential because its natural stickiness helps the onigiri hold their shape.
- Keep your hands damp while shaping the rice balls to prevent sticking.
- You can substitute the chicken with canned tuna, cooked salmon, teriyaki chicken, or sautéed mushrooms for different variations.
- Sprinkle toasted sesame seeds or Japanese furikake seasoning over the rice for extra flavor.
- Store assembled onigiri in an airtight container in the refrigerator for up to 2 days. For the best texture, wrap the nori just before eating.
- These rice balls are excellent for meal prep, lunch boxes, road trips, and picnics.
- Nutritional Note: Chicken onigiri provides a balanced combination of lean protein and carbohydrates, making it a filling and portable meal or snack.