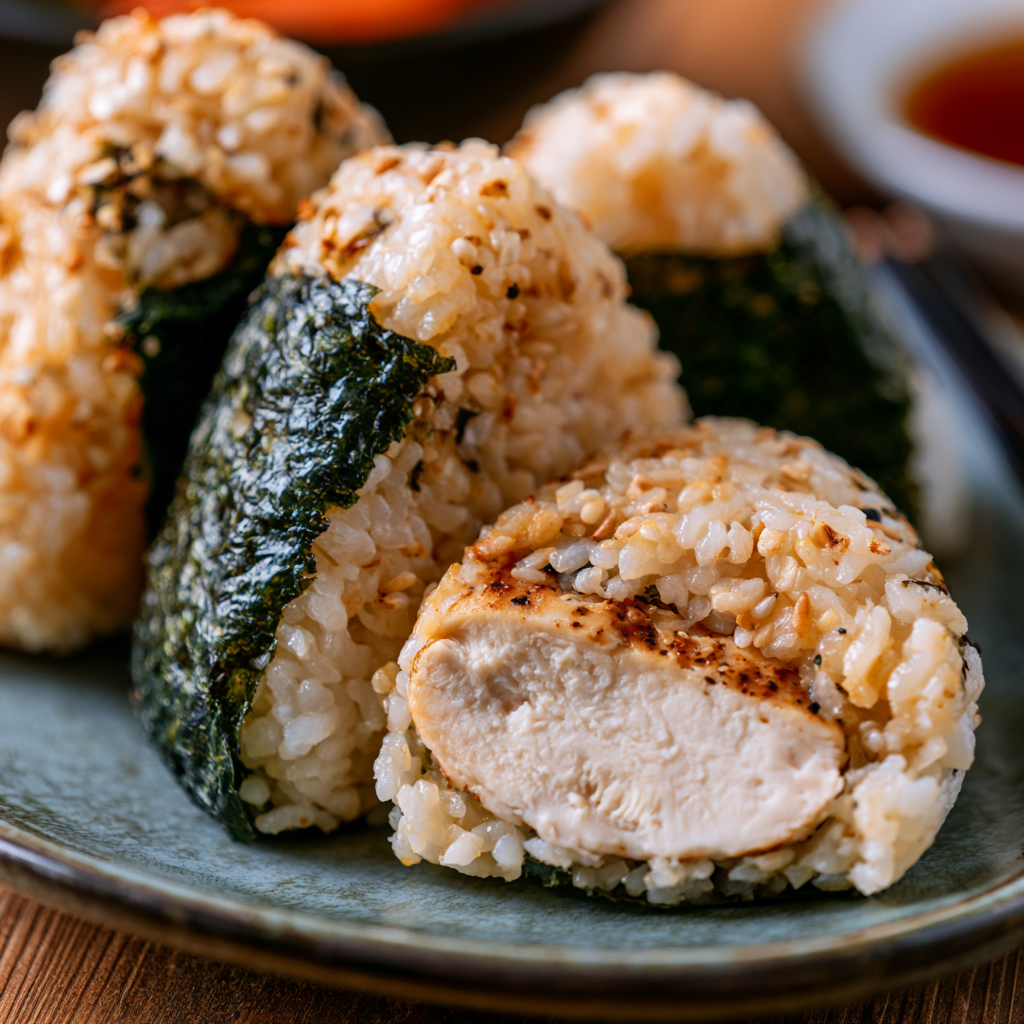
These Easy Chicken Onigiri are delicious Japanese rice balls filled with tender, savory chicken and wrapped in crisp sheets of nori. Made with sticky Japanese-style rice and a flavorful chicken filling, they are simple to prepare, satisfying, and wonderfully portable. Enjoy them as a quick lunch, snack, picnic food, or easy meal for the whole family.
Chicken Onigiri quickly became one of those recipes my family loves having in the fridge. My husband especially enjoys grabbing one when he needs a quick bite because it is filling without feeling too heavy. I love making a batch ahead of time because they are so convenient for busy days.
The best part is watching everyone choose their favorite way to eat them. Some like plenty of nori wrapped around the outside, while others prefer extra chicken filling tucked into the center. Once I started making these at home, they became a regular favorite for lunches and casual family meals.
Why This Easy Chicken Onigiri Japanese Rice Balls
- Simple everyday ingredients: You only need a handful of accessible ingredients to create these flavorful rice balls.
- Savory chicken filling: Tender chicken is seasoned with soy sauce, ginger, garlic, and a touch of sweetness.
- Perfect texture: Short-grain rice holds together beautifully, making the onigiri easy to shape and eat.
- Portable and convenient: These rice balls are ideal for lunchboxes, picnics, road trips, and quick snacks.
- Customizable: Add sesame seeds, green onions, Japanese mayonnaise, or a little chili sauce to personalize the filling.
- Family-friendly: Their compact size and mild savory flavor make them an easy favorite for both kids and adults.
Ingredients
Makes 8 medium onigiri
For the Rice
- 2 ½ cups cooked Japanese short-grain rice — about 500 g (1.10 lb)
- ½ teaspoon salt — about 3 g (0.006 lb)
- 2 tablespoons toasted sesame seeds — about 18 g (0.04 lb)
For the Chicken Filling
- 10 oz (280 g / 0.62 lb) boneless, skinless chicken thighs or breast
- 1 tablespoon soy sauce — about 15 g (0.03 lb)
- 1 tablespoon mirin — about 15 g (0.03 lb)
- 1 teaspoon honey or sugar — about 7 g (0.015 lb)
- 1 teaspoon sesame oil — about 5 g (0.01 lb)
- 1 teaspoon freshly grated ginger — about 5 g (0.01 lb)
- 1 garlic clove, finely minced — about 4 g (0.009 lb)
- 2 green onions, thinly sliced — about 25 g (0.055 lb)
- 1 teaspoon neutral cooking oil — about 5 g (0.01 lb)
For Assembly
- 2 sheets roasted nori — about 6 g (0.013 lb)
- Water, for shaping the rice
- Optional: extra sesame seeds for topping
Directions
- Cook the chicken. Cut the chicken into very small pieces. Heat the cooking oil in a skillet over medium heat and add the chicken. Cook until the pieces are browned and completely cooked through.
- Season the filling. Add the soy sauce, mirin, honey, sesame oil, ginger, and garlic to the pan. Stir well and cook for another 2–3 minutes, allowing the sauce to coat the chicken and become slightly glossy.
- Finish the filling. Turn off the heat and stir in the sliced green onions. Allow the chicken mixture to cool slightly. Chop it more finely if the pieces are too large for the rice balls.
- Prepare the rice. Place the warm cooked Japanese rice in a large bowl. Gently fold in the sesame seeds and salt. Avoid aggressively mixing the rice, as keeping the grains intact gives the onigiri a better texture.
- Wet your hands. Dip your hands lightly in water to prevent the rice from sticking. Sprinkle a small amount of salt over your palms if desired.
- Shape the onigiri. Take roughly ½ cup of warm rice and flatten it gently in your palm. Place a spoonful of chicken filling in the center, then carefully bring the rice around the filling until it is completely enclosed.
- Form the rice ball. Gently press and shape the rice into a triangle, ball, or rounded oval. Do not squeeze too tightly—the rice should hold its shape while remaining tender.
- Wrap with nori. Cut the nori sheets into strips or smaller rectangles and wrap each rice ball. Add a sprinkle of sesame seeds on top if desired.
- Serve. Enjoy the chicken onigiri warm, at room temperature, or chilled. For the best texture, serve them the same day they are prepared.
Notes
- Rice matters: Japanese short-grain or sushi rice is ideal because its natural stickiness helps the onigiri stay together.
- Chicken choice: Chicken thighs provide a juicier, richer filling, while chicken breast creates a leaner option.
- Don’t overpack: Press the rice firmly enough to hold together, but avoid compressing it too much.
- Keep your hands moist: Lightly wetting your hands between each onigiri makes shaping much easier.
- Filling variations: Try cooked salmon, tuna mayonnaise, teriyaki chicken, cooked mushrooms, or pickled vegetables.
- Add spice: A little chili crisp, sriracha, or Japanese chili seasoning can give the chicken filling a spicy twist.
- Nori tip: For crisp nori, wrap the rice balls shortly before serving. If making them ahead, keep the nori separate until you’re ready to eat.
- Storage: Store prepared onigiri in an airtight container in the refrigerator and enjoy within 1 day for the best texture. Let refrigerated rice warm slightly before eating, as chilled rice can become firm.
- Lunchbox idea: Pair two or three onigiri with cucumber slices, edamame, fruit, or a simple Japanese-style salad for a convenient meal.